In summary:
- Mastering photopolymer printmaking involves a dialogue between digital precision and the physical response of the plate and ink.
- Calibrating UV exposure times is the critical first step to achieving crisp lines and rich tonal range, preventing common errors like under-exposure.
- The water-washout process is not only safer than acid but offers superior vertical etching, preserving fine details without the risk of undercutting.
- Professional practice extends beyond printing, requiring an understanding of ink modification, hybrid techniques, and the formal rules of editioning and plate cancellation.
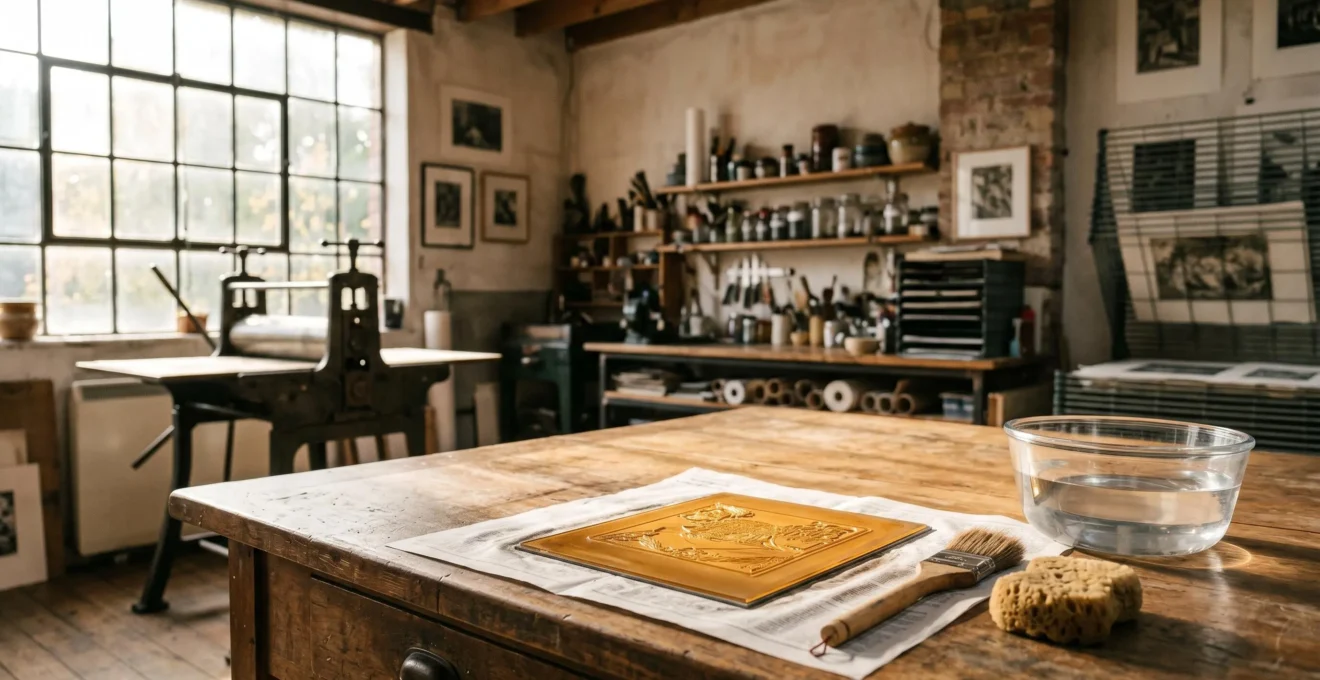
For generations, the deep, velvety lines of intaglio printing were inextricably linked to the corrosive bite of acid and a studio filled with hazardous chemicals. Printmakers seeking safer, greener alternatives often felt they had to compromise on quality. The arrival of photopolymer plates promised a revolution: a light-sensitive, water-developable medium that could replicate the intaglio look without the toxicity. Yet, many artists soon discovered that this wasn’t a simple shortcut. Merely swapping acid for UV light doesn’t guarantee a great print; it introduces a new set of variables and a different kind of craft.
The common approach is to treat photopolymer printmaking like a digital-to-analog photocopier, following a rigid recipe of exposure times and Photoshop curves. But what if the true potential of this medium lies not in its perceived simplicity, but in its unique material intelligence? The key to unlocking its power is to move beyond seeing it as a replacement for traditional etching and embrace it as a distinct medium. This requires learning a new language—a material dialogue between digital intent, the plate’s response to light, and the physical properties of ink.
This guide is built on that principle. We won’t just give you a recipe; we will teach you how to read the ingredients. You will learn to diagnose your plates, modify your materials, and understand the ‘why’ behind each step. By embracing this philosophy of calibrated craft, you will transform the photopolymer process from a technical challenge into a rich and responsible artistic practice, creating prints that are not only safer for you and the environment but also possess a unique and sophisticated beauty.
This article will guide you through the essential stages of mastering photopolymer plates, from the foundational science of exposure to the final professional touches of editioning. Explore the sections below to build your expertise.
Summary: A Guide to Non-Toxic Intaglio: Mastering Photopolymer Plate Printmaking
- Sun or UV Box: How to Calibrate Exposure Times for Crisp Lines?
- Water Washout: Why Is Photopolymer Safer than Nitric Acid?
- Stiff or Loose: How to Modify Ink for Polymer Plates?
- The Error of Under-Exposing and Losing Fine Details
- Photoshop to Plate: How to Prepare Digital Negatives for Printmaking?
- Resist and Developer: How to Paint with Chemistry on Photo Paper?
- Strike Through: Why Must You Cancel the Plate after Printing?
- Artist Proof vs Limited Edition: What Are the Rules of Numbering Prints?
Sun or UV Box: How to Calibrate Exposure Times for Crisp Lines?
The foundation of any successful photopolymer print is a perfectly calibrated exposure. This isn’t a « set it and forget it » process; it’s the first and most crucial step in your material dialogue. Whether you use a professional UV exposure unit or the variable power of the sun, your goal is the same: to determine the precise amount of UV light needed to harden the polymer, creating sharp lines and a durable structure to hold ink. Under-exposure leads to weak, crumbly plates, while over-exposure fills in fine details. Calibration is how you find the « sweet spot » for your specific setup.
The process involves two key exposures: the aquatint screen exposure, which creates a fine dot pattern (the « tooth ») across the plate to hold ink in tonal areas, and the image exposure, which hardens the plate through your digital negative. A common mistake is using a single exposure time for both. In reality, they serve different functions and require separate testing. An aquatint screen might need a shorter, lighter exposure than a negative with dense black areas. Mastering this balance is the essence of calibrated craft.
The image above reveals the goal of calibration: a perfectly formed microscopic landscape. The hardened polymer creates a dot matrix capable of holding ink for rich tones, while the unexposed areas have washed away cleanly to form the deep recesses for your lines. Achieving this level of precision requires a systematic test.
Your Action Plan: DIY Exposure Test Procedure
- Create a gradient step-wedge test plate with incremental exposure times. A common method is to start at 6 seconds and increase in 1-2 second increments, moving a blocking card horizontally down the plate one inch per exposure.
- For the double-exposure method, first expose the entire plate with an aquatint screen to create tooth for tonal range, then expose it again with your image transparency.
- After processing the test plate in water, ink it up and compare the results to identify the minimum exposure time that achieves a solid, 100% black without losing detail.
- To find the ideal time, you can use the formula from experts at Intaglio Editions: minimum time for solid black × 1.6 gives the optimum exposure for the finest aquatint pattern.
- Document your results meticulously. Remember to adjust and re-test for different UV sources; DIY blacklight boxes require much longer times than professional metal halide units, and sunlight varies dramatically by weather, season, and time of day.
Ultimately, calibration empowers you. It moves you from guessing to knowing, providing a reliable baseline that allows you to print with confidence and consistency.
Water Washout: Why Is Photopolymer Safer than Nitric Acid?
The most celebrated feature of photopolymer printmaking is its elimination of harsh acids, making the studio a safer place. The process is a cornerstone of responsible innovation in the arts. Instead of submerging a metal plate in a corrosive bath, a photopolymer plate is « etched » or developed simply with water. The unhardened polymer, protected from UV light by the black areas of your negative, dissolves away, leaving the intaglio recesses. This simple substitution has profound health implications.
Traditional etching with nitric acid on copper or zinc releases dangerous fumes. Comprehensive safety analyses confirm that the nitrous oxide gases from nitric acid etching are suspected of causing severe long-term health issues, including damage to the eyes, nerves, lungs, and kidneys. By replacing this chemical process with a gentle water bath and a soft brush, photopolymer printmaking removes a major category of risk from the print studio. However, the benefits extend beyond personal safety and into the realm of technical quality.
Case Study: Vertical Washout vs. Acid Undercutting
The way acid etches a metal plate is fundamentally different from how a polymer plate develops. As detailed in non-toxic printmaking research, acid solutions can cause « foul-biting » and « undercutting, » where the acid eats sideways under the protective ground, weakening fine lines and causing them to collapse. This effect worsens as the acid bath ages and its chemistry changes. In contrast, the photopolymer washout process is primarily vertical. The water dissolves the unexposed polymer straight down to the plate’s backing. This results in a much more faithful digital-to-analog translation, where the lines on the plate are a direct, stable representation of the lines in your digital negative, a quality that remains consistent throughout the material’s life.
Therefore, the water washout is more than a safety precaution; it’s a technical advantage that provides a level of fidelity and consistency that can be difficult to achieve with traditional acid etching.
Stiff or Loose: How to Modify Ink for Polymer Plates?
Once you have a perfectly exposed and developed plate, the next phase of the material dialogue begins: inking. Polymer plates behave differently than traditional copper or zinc. Their relief is often shallower and the polymer surface itself has different properties. This requires a specific approach to ink modification and wiping. Using ink straight from the can will often lead to disappointing results; it might be too stiff to get into fine details or too loose, wiping out of the shallow recesses too easily.
The goal is to find an ink consistency that is both soft enough to work into the finest pits of the aquatint texture and sturdy enough to stay there during wiping. This usually means modifying your ink. Many printmakers add a small amount of burnt plate oil or other modifiers to loosen a stiff ink. Conversely, a bit of magnesium carbonate can be used to stiffen a loose ink. The quality of the ink itself also plays a significant role. As printmaker Jon Lybrook of Intaglio Editions notes, « Finer particles of pigment suspended in the better-quality inks tend to sit deeper in the fine pits of…high-resolution plates. »
Wiping is the other half of this equation. A heavy hand can easily pull ink from the shallow polymer grooves, resulting in a weak, flat print. The technique requires a progressively lighter touch. Here is a systematic approach to wiping polymer plates:
- Apply the Ink: Use a plastic scraper or brayer to apply the ink. Avoid using stiff mat board scraps, which can scratch the delicate polymer surface. Work the ink into the plate with a light grinding motion.
- Prepare Tarlatan: Use lightly starched tarlatan pads. A good preparation method involves soaking them in water for 25-30 minutes, drying them completely, and then pulling the fabric apart to soften it.
- The Initial Wipe: Begin with your « dirtiest » tarlatan (one already holding a good amount of ink) and use firm, circular motions to push the ink deep into the plate’s recesses while removing the bulk from the surface.
- Progressively Cleaner Wipes: Switch to progressively cleaner and softer tarlatan pads for subsequent passes. With each pass, your touch should become lighter and lighter. Over-wiping is a common error that leads to flat prints.
- The Final Polish: For the final pass, use a very light touch with tissue paper, phone book pages, or the palm of your hand to lift the last veil of « plate tone » from the surface without disturbing the ink held in the lines and texture.
This careful, multi-stage process ensures that you get the richest possible print, balancing deep, saturated blacks with brilliant highlights—a direct result of your hands-on, calibrated craft.
The Error of Under-Exposing and Losing Fine Details
In photopolymer printmaking, there are no « mistakes, » only data. A print that comes off the press looking blotchy, faded, or lacking detail is not a failure; it is your plate communicating with you. Learning to interpret these visual cues is the key to developing plate intelligence. The most common and frustrating issue for beginners is under-exposure, which can manifest in several ways. It’s a critical error because it compromises the fundamental structure of the polymer before you even get to the inking stage.
Under-exposing the aquatint screen means the dot pattern that holds tone isn’t hardened enough. It remains soft and weak, and during washout, this delicate structure can be damaged or completely washed away. The result in the print is a « moth-eaten » or lacy texture in dark areas that should be solid black. Similarly, under-exposing the image negative means the fine lines and light gray tones don’t receive enough UV energy to fully harden. They become brittle and can crumble or break off during the washout or wiping process, completely disappearing from the final print.
Developing the ability to look at a flawed print and trace the problem back to a specific exposure issue is a vital skill. It’s the difference between randomly adjusting times and making informed, targeted corrections. The following guide is a diagnostic tool—a Rosetta Stone for translating the visual language of your print into concrete solutions at the exposure stage.
| Symptom in Print | Diagnosis | What Happens at Plate Level | Solution |
|---|---|---|---|
| Blotchy blacks, lacy/moth-eaten texture | Aquatint screen under-exposed | Insufficient UV hardening creates weak polymer structure; unhardened areas wash away and weaken surrounding properly exposed zones during washout | Increase screen exposure time; test with longer aquatint exposure intervals |
| Loss of finest lines and light tones (details in whites) | Image under-exposed | Thin line areas don’t receive enough UV to fully harden; crumble during washout | Increase image exposure time; use a step wedge to target a higher step number |
| Filled-in dark tones, loss of aquatint grain | Over-exposed (either screen or image) | Excessive UV causes undercutting/spreading of hardened areas, closing up fine dots needed to hold ink | Decrease exposure time; multiply previous time by 0.7 to drop one step on a test wedge |
| Large open areas won’t hold ink (open biting) | Aquatint screen insufficient | No dot matrix structure created to hold ink; smooth polymer surface rejects ink during wiping | Ensure screen exposure occurs first and is adequate; check screen is emulsion-to-emulsion with plate |
By using this diagnostic approach, you shift from being a passive operator to an active, responsive printmaker, engaging in a true dialogue with your materials. This is the heart of mastering the photopolymer process.
Photoshop to Plate: How to Prepare Digital Negatives for Printmaking?
The process of creating a photopolymer print begins long before you step into the darkroom; it starts on the screen. Preparing a digital negative is not as simple as inverting an image and hitting « print. » It is a sophisticated act of digital-to-analog translation. You are creating a specific tool—the negative—designed to control UV light in a precise way. This requires understanding how the plate « sees » tones differently than your monitor or a standard inkjet printer.
A key concept to grasp is that the photopolymer process is not linear. A 10% gray on your screen will not automatically translate to a 10% gray in your final print without intervention. As Jon Lybrook explains in the Polymer Photogravure Procedures Manual, « Plates don’t ‘see’ a linear range of tones and a curve is needed to compensate, ensuring that the 10% grays in the file actually print as 10% grays. » This compensation is done in Photoshop using a « curves » adjustment layer. Creating this custom curve is a core part of your calibrated craft, and it often involves printing a step wedge, analyzing the results, and building a curve that remaps the tones of your digital file to achieve the desired output on the plate.
The negative itself must also be of high quality. You need an inkjet printer capable of laying down a sufficiently dense layer of UV-blocking ink. Specialized transparency films like Pictorico OHP are designed for this purpose, providing a surface that holds the ink without beading, resulting in sharp, opaque details. The negative is the blueprint for your print; any flaws in it, such as banding from a clogged printer nozzle or insufficient ink density, will be faithfully reproduced on your plate.
Ultimately, the digital negative is where your artistic intent is first encoded. Taking the time to master its creation ensures that the signal sent to the plate is as clear, strong, and nuanced as your creative vision.
Resist and Developer: How to Paint with Chemistry on Photo Paper?
While photopolymer printmaking is celebrated for its ability to flawlessly reproduce photographic detail, its true versatility is revealed when artists break free from pure reproduction. Interpreting the title’s « Paint with Chemistry » metaphorically, we can explore how to manually alter the plate’s physical surface. This introduces a gestural, autographic mark that beautifully counters the « technological slickness » of a purely digital workflow. It transforms the plate from a passive receptor of light into an active partner in a material dialogue.
This hybrid approach allows the printmaker to combine the precision of a photographic image with the expressive power of traditional intaglio techniques. The hardened polymer surface is receptive to a surprising range of manual interventions. It can be worked on both before and after the main exposure, or even used without any photographic element at all, functioning as a non-toxic plate for direct mark-making.
Case Study: Hybrid Techniques and Direct Mark-Making
The photopolymer plate is not a fragile, hands-off surface. As demonstrated in non-toxic printmaking manuals, its hardened film can be directly manipulated to create a rich vocabulary of marks. An artist can draw into the surface with a sharp etching needle to produce crisp, delicate drypoint lines. Aggressive scraping or scratching can create expressive, textured areas. Roughening the surface with sandpaper generates dark, mezzotint-like tones, while burnishing can smooth the polymer to lighten areas of a print. This manual manipulation can even begin at the negative stage, with artists drawing directly onto transparent film with pencils, crayons, or ink to marry photographic elements with hand-drawn ones in a single exposure. This fusion of techniques allows for a unique blend of precision and spontaneity.
This approach reframes the photopolymer plate not as a substitute for a copper plate, but as a uniquely versatile substrate in its own right, one that welcomes the artist’s hand at every stage of the process.
Strike Through: Why Must You Cancel the Plate after Printing?
The printmaking process doesn’t end when the last print is pulled from the press. For a limited edition, there is one final, crucial step: canceling the plate. This act is a cornerstone of professional printmaking ethics and a fundamental part of being a responsible innovator in the field. To cancel a plate means to permanently deface it, ensuring that no more impressions can be made from it. This act guarantees the integrity and scarcity of the limited edition, protecting the artist, the collectors, and the value of the artwork.
In the world of fine art printing, the number on the print (e.g., 7/50) is a promise to the collector that only 50 prints of this image, in this state, will ever exist. Canceling the plate is the physical fulfillment of that promise. Failing to do so leaves open the possibility of future prints being made, which would devalue the entire edition and damage the artist’s reputation. A « cancellation proof »—a final print pulled from the defaced plate—is often created to serve as a definitive record of the edition’s conclusion.
The robust nature of photopolymer plates means cancellation must be decisive and irreversible. Simply scratching the surface lightly is not enough. The goal is to make the plate physically unprintable. Here are several effective methods for definitively canceling a polymer plate:
- Scoring: Use a sharp utility knife, scribe, or other metal tool to score a large « X » across the entire image area. The score must be deep enough to penetrate the polymer layer and damage the plate’s ability to be inked and wiped evenly.
- Cutting: For smaller plates, using heavy-duty metal shears or scissors to cut the plate in half or into quarters is an unambiguous method of cancellation.
- Re-Exposure: A less physical but equally effective method is to fully expose the plate to a strong UV light source without any negative. This hardens the entire surface, flattening the relief and rendering it smooth and unprintable.
This simple but profound gesture of striking through the matrix is a mark of respect for the medium, the market, and the very concept of a limited edition fine art print.
Key Takeaways
- Photopolymer printmaking is a distinct craft, not a shortcut; mastery comes from learning the ‘dialogue’ between digital files, UV light, plates, and ink.
- Accurate calibration of exposure times for both the aquatint screen and the image negative is the non-negotiable foundation for achieving high-quality, detailed prints.
- Embracing a diagnostic mindset, where ‘errors’ in a print are seen as data, is key to developing ‘plate intelligence’ and solving problems efficiently.
Artist Proof vs Limited Edition: What Are the Rules of Numbering Prints?
The final touch that transforms a beautiful impression on paper into a collectible work of art is the act of signing and editioning. This formal notation, typically done in pencil in the bottom margin of the print, is a universally recognized language that communicates the print’s identity, its place within an edition, and its authenticity. Understanding and correctly applying these conventions is as much a part of the printmaker’s craft as wiping a plate. It is the final step in presenting your work professionally and ethically to the world.
The most common notation is the fraction representing the limited edition, such as « 1/50. » The bottom number indicates the total number of prints in the edition, and the top number indicates the individual number of that specific impression. However, the world of editioning includes many other important designations that an artist must manage. These are not arbitrary letters but specific categories of prints that exist outside the main numbered edition, each with its own purpose and value.
For example, « AP » stands for Artist’s Proof. These are prints of the same quality as the edition but are reserved for the artist’s personal use, for their portfolio, or as gifts. Historically, they were the artist’s payment when working with a collaborative print studio. The number of APs is typically limited, often around 10-15% of the main edition size. Navigating these different proof types is essential for maintaining a professional practice. The following glossary outlines the standard conventions every printmaker should know.
| Notation | Full Term | Purpose | Typical Quantity | Market Position |
|---|---|---|---|---|
| AP | Artist’s Proof | Reserved for artist’s personal use, portfolio, or gifts; historically the artist’s compensation in collaborative printing | 10-15% of edition size (e.g., 5 APs for edition of 50) | Often valued slightly higher than edition prints due to rarity |
| PP | Printer’s Proof | Reserved for the master printer or print studio that collaborated on production | 1-3 prints, or 10% of edition if collaborative studio printing | Equal value to edition prints; documents printer’s role |
| BAT | Bon à Tirer (French: good to pull) | The approved proof that establishes the standard for the entire edition; kept by printer as reference | 1 print only | Highly valued by collectors as the definitive reference print |
| HC | Hors Commerce (French: not for sale) | Outside commerce; for exhibition, institutional gifts, or documentation; not intended for sale | Varies, typically 2-5 prints | Same intrinsic value as edition, but with restricted market availability |
| TP | Trial Proof | Working proofs made during the development process, showing experimentation before arriving at BAT | Varies widely (3-15+ depending on complexity) | Can be highly valued if they show significant variation or artist’s process |
| VE | Variable Edition | Each print intentionally varied through different inking (à la poupée), chine-collé, or hand-coloring while using same plate | Not limited by convention | Each print treated as unique variant; photopolymer particularly suited for this approach |
By adhering to these established rules, you demonstrate respect for the history of printmaking and provide clarity and confidence to collectors, galleries, and institutions, solidifying your position as a professional artist.