Mastering gold leaf is not about the tools you own, but the sensory knowledge you cultivate to command light itself.
- True mastery lies in understanding the ‘why’ behind each step—from the foundational cushion of clay bole to the exact moment the surface is ready to burnish.
- The choice between real gold, gilding method, and sealant is an aesthetic decision, not just a technical one, defining the final voice and permanence of your artwork.
Recommendation: Shift from merely following steps to actively listening to your materials to achieve unparalleled luminosity, depth, and archival integrity in your art.
The allure of gold in art is timeless. It is not merely a color but an embodiment of light, capable of transforming a painted surface into a source of profound luminosity. For the contemporary artist, incorporating gold leaf is a bridge between modern expression and centuries of tradition, a way to add both monetary and conceptual value to their work. Yet, many artists approach gilding as a mechanical task, a simple checklist of applying adhesive and pressing on a fragile sheet. This often leads to lackluster results: a shine that is flat, a surface that tarnishes, or a finish that lacks the deep, liquid glow of masterworks.
The common advice simplifies the craft into two paths: oil gilding for ease and water gilding for brilliance. But this binary choice overlooks the nuanced dialogue between the artist and their materials. The true craft lies beyond the basic steps. It is found in understanding the foundational chemistry of your chosen leaf, the physics of a perfectly prepared ground, and the precise moment—judged by sound and touch—that a surface is ready to be polished into a mirror. It involves knowing when to seal the gold and when to leave it bare, accepting the aesthetic compromise that protection often entails.
This guide departs from the superficial ‘how-to’. It delves into the gilder’s sensory knowledge, focusing on the critical decisions that elevate gilding from a decorative technique to a masterful art form. We will explore the fundamental choices that dictate the final outcome, from the integrity of your materials to the subtle interaction between paint and precious metal. By understanding the ‘why’ behind each traditional practice, you will learn not just to apply gold, but to command it.
To navigate this intricate craft, this article is structured to guide you through the crucial decisions a master gilder makes. The following sections break down each stage, from material selection to the final finish, providing the knowledge needed to turn metal leaf into pure light.
Summary: A Gilder’s Path to Mastering Light and Gold
- 24k or Imitation: When Is It Acceptable to Use Fake Gold in Art?
- Bole and Gesso: Why Is Surface Preparation Critical for a Mirror Finish?
- Oil or Water: Which Gilding Size is Best for Beginners?
- The Error of Burnishing Too Soon and Tearing the Leaf
- Varnish or Bare: Should You Seal Gold Leaf on a Painting?
- Why Is the Old Master Glazing Technique Still Relevant for Contemporary Oil Painters?
- Yolk and Water: How to Prepare Fresh Egg Medium Daily?
- Why Is Egg Tempera the Best Medium for Luminosity and Detail?
24k or Imitation: When Is It Acceptable to Use Fake Gold in Art?
The first and most consequential decision a gilder makes is the choice of leaf. This is not a matter of budget alone, but a declaration of intent for the artwork’s longevity and chemical stability. Genuine 24-karat gold is an elemental substance; it is noble. According to conservation research, pure 24k gold leaf consists only of precious metal and will not tarnish or react with the environment. It offers an incorruptible, permanent brilliance that will endure for centuries, just as it has on ancient artifacts and manuscripts. This makes it the only acceptable choice for works intended for archival-quality, fine art contexts where permanence is paramount.
Imitation leaf, often called composition leaf or Dutch metal, is a brass alloy of copper and zinc. While it can create a convincing initial effect, it is fundamentally reactive. Over time, it will inevitably tarnish, darken, and corrode, especially when exposed to humidity or pollutants. Its use in fine art should be considered with extreme caution and full awareness of its transient nature. It may be acceptable for ephemeral works, studies, or decorative craft projects where longevity is not the primary goal. However, introducing it into a serious painting creates a chemical instability that can compromise the entire piece.
Case Study: The Chemical Betrayal of Imitation Leaf
Conservation studies have highlighted the significant risks of painting over composition leaf. The ammonia commonly found in waterborne acrylic paints, for instance, acts as a powerful catalyst that dramatically accelerates the tarnishing of the copper-based alloy. An artist might apply a glaze over what appears to be a stable gold-colored surface, only to watch it shift to a murky green or brown within months. To mitigate this, a robust, non-porous isolation barrier like MSA Varnish or Archival Varnish with UVLS must be applied over the imitation leaf before any water-based paint is introduced. This adds complexity and still does not guarantee the long-term stability that genuine gold provides inherently.
Ultimately, choosing imitation leaf is an aesthetic and chemical gamble. While its low cost is tempting, the artist must weigh it against the certainty of its eventual decay. For work that is meant to last, 24k gold is not a luxury, but a necessity.
Bole and Gesso: Why Is Surface Preparation Critical for a Mirror Finish?
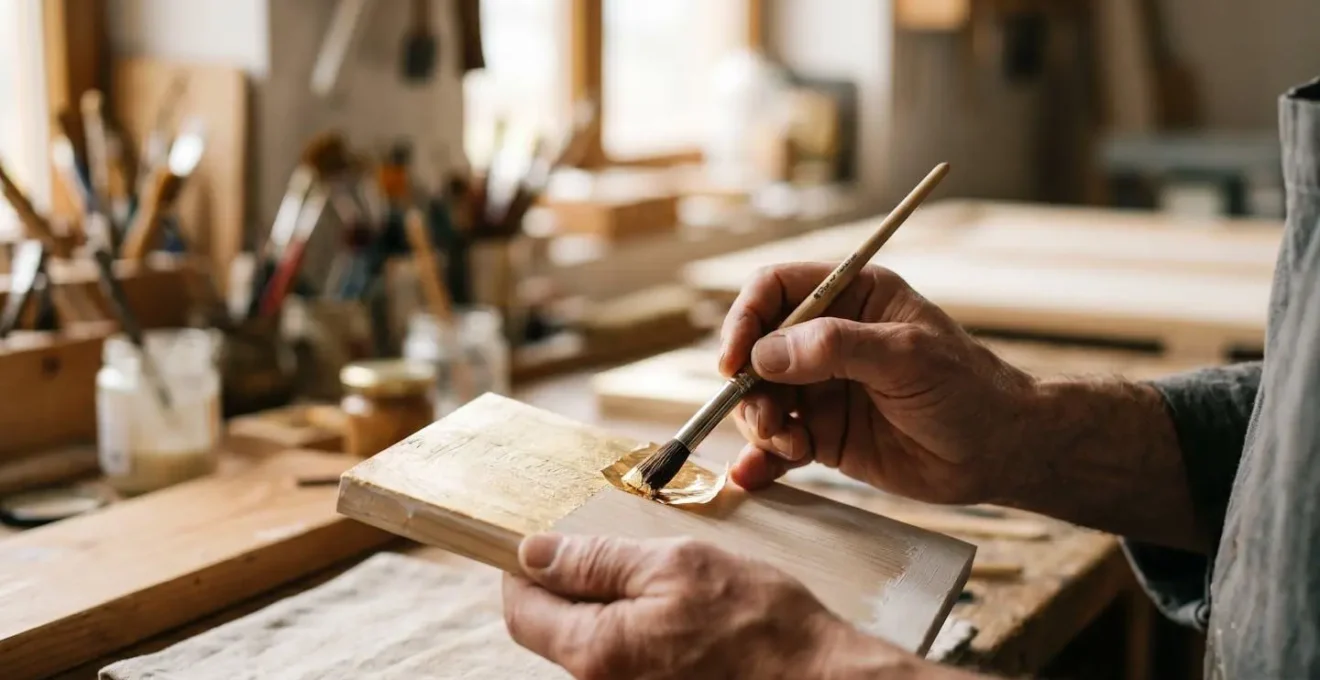
A gold leaf surface is not a coat of paint; it is an impossibly thin skin of metal, often just a few microns thick. It has no body of its own and will telegraph every single imperfection of the substrate beneath it. Therefore, the pursuit of a flawless, mirror-like finish—the hallmark of master-level water gilding—begins not with the gold, but with the painstaking creation of a perfect ground. This foundation, traditionally composed of gesso and clay bole, is what allows the gold to be transformed from a matte sheet into a liquid pool of light.
The process starts with multiple thin layers of true gesso, a mixture of animal hide glue (typically rabbit-skin glue) and a fine chalk or gypsum. This is not to be confused with acrylic « gesso, » which is fundamentally a plastic paint. True gesso creates a brilliant white, absorbent, and sandable surface. After building up 8 to 10 layers and sanding them to a porcelain-like smoothness, several coats of bole are applied. Bole is a refined clay, mixed with the same glue size, and its purpose is threefold: it provides a final, perfectly smooth layer; its color (traditionally red, yellow, or black) adds warmth and depth to the incredibly thin gold; and most importantly, the clay particles provide a microscopic « cushion » that allows the gold to be burnished.
As this detailed view shows, the final surface is a complex, multi-layered system designed for optical perfection. It is this flawlessly smooth, cushioned substrate that allows an agate burnisher to press down on the gold, compressing and polishing the metal particles into a single, seamless, reflective plane. Without this meticulous preparation, achieving a true mirror finish is physically impossible. The surface is, in essence, a throne built specifically to display the majesty of light itself.
Your Action Plan: Auditing Your Gilding Surface for Perfection
- Points of Contact: Identify all tools and materials that will touch your surface, from brushes for the gesso to the cloth used to polish the bole. Are they impeccably clean and free of grit?
- Foundation Inventory: Examine your gesso layers. Are they even and free of pinholes? Have you achieved a surface as smooth as an eggshell after sanding?
- Bole Coherence: After applying the bole, inspect its uniformity. Does the color appear consistent and the sheen even? Any streaks or high spots here will be magnified under the gold.
- Mnemonic Test: Run the back of your fingernail lightly over a test area. A perfectly prepared surface feels exquisitely smooth, with no drag or texture. This tactile memory is your benchmark.
- Integration Plan: Before laying the first leaf, have a clear plan for your water application and gilding sequence to ensure you work systematically across the prepared ground.
Oil or Water: Which Gilding Size is Best for Beginners?
The distinction between water and oil gilding is frequently misrepresented as a simple choice between « difficult » and « easy. » A more precise understanding is that they are two distinct systems designed for entirely different outcomes and applications. The choice is not about your skill level, but about your artistic intent. Do you seek the unparalleled, burnished mirror of traditional iconography, or a softer, more durable satin sheen for broader surfaces?
Water gilding is the older, more complex method, reserved for interior work. Here, the adhesive is the animal glue already present in the clay bole ground. The gilder applies water (the « gilder’s liquor ») to a small section, which reactivates the glue. The gold leaf is immediately applied and, once dry, can be burnished with a polished agate stone to a brilliant, mirror-like finish. This process is fast, demanding, and requires the meticulous gesso and bole preparation discussed previously. As experts in the field note, its primary use reflects this preciousness.
Water gilding is typically set aside for furniture, frames and the most delicate architectural elements in very ornate settings.
– John Canning & Co., A Primer on Gold Leaf Gilding Techniques
Oil gilding, by contrast, uses an oil-based varnish, or « size, » as the adhesive. This size is applied over any sealed, non-porous surface. The gilder must then wait for the size to dry to the correct level of tackiness—a delicate window that can last from 3 to 24 hours depending on the type of size. Once tacky, the leaf is applied. Oil-gilt surfaces cannot be burnished to a mirror shine; they yield a more subdued, satin finish. However, this method is far more durable and weather-resistant, making it the standard for architectural and exterior work. For a beginner, the longer working time of oil gilding can be more forgiving, but it comes at the cost of the ultimate reflective potential.
This table summarizes the core differences, showing that the choice is less about difficulty and more about a strategic trade-off between brilliance, complexity, and durability.
| Characteristic | Water Gilding | Oil Gilding |
|---|---|---|
| Complexity Level | More complicated, labor-intensive | Less arduous, faster process |
| Final Finish | Mirror-like burnished shine possible | Matte to satin finish, cannot achieve true mirror |
| Burnishing | Can be burnished with agate stone | Limited to removal of excess leaf |
| Surface Requirements | Multiple gesso layers + bole required | Sealed non-porous surface |
| Adhesive | Water activates animal glue in bole | Oil-based size becomes tacky |
| Working Time | Fast – work in small sections, water evaporates quickly | Longer – tack window up to 3-24 hours depending on size type |
| Best Applications | Furniture, frames, detailed interior work | Architectural elements, exterior gilding, larger surfaces |
| Durability | Interior use only | Suitable for exterior use, withstands weather |
The Error of Burnishing Too Soon and Tearing the Leaf
In water gilding, the act of burnishing is the moment of apotheosis, where a fragile matte leaf is transformed into a solid, brilliant mirror. It is also the moment of greatest peril. The most common and heartbreaking error is one of timing. Burnishing is a conversation with the moisture content of the gesso and bole ground. If you are too eager and begin too soon, the surface is too soft and wet; the agate burnisher will dig in, smearing or tearing the gold. If you wait too long, the ground becomes too dry and brittle; the necessary « cushion » is gone, and the burnisher will scratch the gold or even lift it clean off the bole. Mastery of this step relies almost entirely on developing sensory cues rather than watching a clock.
The readiness of the surface is determined by a combination of sound and touch. A seasoned gilder learns to listen to the surface. In the words of gilder Judith Wetherall, this is a distinct auditory test. A passage from her notes on the traditional English method, hosted by leading material experts Natural Pigments, illustrates this perfectly.
The gilder lightly taps the burnisher on a discreet area; the surface should sound hollow and resonant, not soft or silent.
– Judith Wetherall, Gilding Notes: The Traditional English Method (via Natural Pigments)
This « hollow and resonant » sound indicates that the underlying gesso has dried sufficiently, creating a firm but still flexible foundation. A silent or soft tap signals that moisture is still present, and burnishing would be catastrophic. The window of opportunity can be as short as 15 minutes or as long as a day or two, depending entirely on the ambient humidity and temperature of the studio. There is no formula; there is only observation and experience. The gilder must learn to diagnose the symptoms of poor timing: a mushy smear means the bole is too wet, while a clean tear that lifts the clay indicates the surface has become too dry. This focus on tactile and auditory feedback is the very essence of the craft.
Repairing a tear requires immense delicacy. A tiny patch of leaf is laid over the blemish using moisture from one’s breath to reactivate the bole, then carefully burnished to blend the seams. It is a testament to the fact that in gilding, patience and listening are more valuable than any tool.
Varnish or Bare: Should You Seal Gold Leaf on a Painting?
Once the gold leaf is applied, a critical question arises: should it be sealed? The answer is a definitive « it depends, » and it hinges on two factors: the type of leaf used and the artist’s intention to paint over it. For genuine 24k gold leaf that will not be painted on, the best practice is often to leave it unsealed. Pure gold does not tarnish and requires no protection from the air. Any varnish or sealer, no matter how high-quality, is an additional layer that light must travel through. This inevitably creates a refractive shift that will slightly, but perceptibly, diminish the sharp, hard brilliance of a burnished, mirror-like finish. Leaving the gold bare preserves its purest optical quality.
However, the situation changes entirely if you plan to apply paint over the leaf. In this case, sealing is not just recommended; it is often essential. A sealant acts as an isolation coat, protecting the delicate leaf from the physical abrasion of brushstrokes and preventing any chemical interaction between the paint and the size or substrate. This is true even for genuine gold leaf when using certain techniques. When it comes to sealing a surface that incorporates both gold leaf and oil paint, the key is compatibility.
As the comparison above illustrates, the decision to seal is an aesthetic compromise. The varnished side has a softer, more diffuse glow, while the bare side retains its sharp, mirror-like reflective power. According to artist and author Nancy Reyner in her guide on mastering gold leaf techniques, when sealing both oil paint and leaf together, a fine art varnish designed for oil paints is the ideal choice. She specifically recommends a conservation-grade, removable varnish like Gamblin’s Gamvar, which provides UV protection and is compatible with both genuine and imitation leaf. This archival-quality approach ensures the painting can be cleaned and conserved in the future without damaging the underlying leaf.
Ultimately, do not seal genuine gold unless you must. If you must, because you are painting over it or unifying a mixed-media surface, choose a high-quality, removable artist’s varnish and accept the subtle shift in the gold’s magnificent light.
Why Is the Old Master Glazing Technique Still Relevant for Contemporary Oil Painters?
The practice of glazing—applying thin, transparent layers of oil paint—is a technique synonymous with the Old Masters, used to achieve unparalleled depth and luminosity. When this ancient technique is combined with a gold-leafed ground, its power is magnified exponentially. For contemporary artists, this pairing is not a nostalgic throwback but a highly relevant method for manipulating light in ways that are simply impossible with opaque paint alone. It is the key to making color glow from within.
The principle is based on simple optics. When a transparent glaze of color is applied over a burnished gold-leaf surface, light behaves in a unique way. It passes through the transparent film of paint, strikes the highly reflective gold ground, and is reflected back out towards the viewer, passing through the color a second time. This effectively illuminates the color from behind. The effect is a deep, vibrant luminosity that seems to emanate from the painting itself, rather than sitting on the surface. An artist’s testimonial from Golden Artist Colors confirms this unique phenomenon, stating that with glazes over gold, « the light passes through the paint, reflects off the gold, and illuminates the color from behind, creating unparalleled luminosity. »
Case Study: Contemporary Masters of Luminous Gilding
The relevance of this technique is powerfully demonstrated in the work of contemporary artists who have made it a cornerstone of their practice. According to a journal from a professional gilding studio, artists like Brad Kunkle and Fred Wessel are modern exemplars. Kunkle uses oil glazes over gilded grounds to create his ethereal, dreamlike figurative paintings, where the gold emerges and recedes, giving the scenes a magical, otherworldly light. Fred Wessel, working in egg tempera, uses traditional water gilding in conjunction with detailed painting, creating icons and portraits that have the radiant glow of Renaissance masterpieces. Both artists prove that this « Old Master » technique is a potent tool for contemporary expression, capable of producing visual effects that feel entirely new and captivating.
By understanding and employing this combination, contemporary painters can move beyond representing light and begin to use light as a physical material in their work, infusing their art with a brilliance and life that captivates the eye.
Yolk and Water: How to Prepare Fresh Egg Medium Daily?
For artists working with egg tempera, the medium is not something bought from a tube; it is made fresh, often daily, from the simplest of ingredients: egg yolk, water, and pigment. The preparation of this binder is a ritual that directly impacts the paint’s behavior, from its flow and opacity to its final finish. While the basic recipe is straightforward, mastering the medium involves understanding how to subtly adjust the ratio of yolk to water for different applications.
The process begins by separating a fresh egg yolk from the white and the surrounding membrane (the chalaza). The intact yolk is rolled on a paper towel to dry its surface before being punctured, allowing the pure yolk to run out into a clean container. This pure yolk is then diluted with distilled water. The ratio is key: a leaner medium (more water, less yolk) is used for initial layers. It is more absorbent and flows easily, allowing the artist to build up the forms with fine, cross-hatched strokes. For later stages, or when painting over less absorbent surfaces like gold leaf, a richer medium (less water, more yolk) is required. This provides better adhesion and coverage on the non-porous metal.
The medium is notoriously short-lived. A freshly made binder will spoil within a day, developing a foul smell that signals it must be discarded. While a few drops of clove oil or vinegar can extend its life to two or three days, many purists advocate for the discipline of daily preparation. An artist quickly learns to read the paint’s consistency. If the medium beads up on the painting surface, it is too oily (rich). If the color appears pale, weak, and chalky when dry, the medium was too watery (lean). This constant adjustment and immediate feedback create an intimate connection between the artist and their materials, a core tenet of the tempera discipline.
Key Takeaways
- True mastery in gilding comes from sensory knowledge—listening to the surface and feeling the tack—not just following steps.
- The choice between 24k gold and imitation leaf is an archival decision; genuine gold offers permanence, while imitation leaf will inevitably tarnish.
- Surface preparation is paramount; a flawless mirror finish is only possible on a meticulously prepared ground of gesso and cushioned clay bole.
Why Is Egg Tempera the Best Medium for Luminosity and Detail?
For centuries, from the radiant Byzantine icons of the 4th century to the jewel-like Florentine panel paintings of the early Renaissance, egg tempera and gold leaf have been inseparable partners. This historical symbiosis is not an accident of tradition but a result of perfect technical compatibility. Egg tempera possesses a unique set of properties that make it the ideal medium for working alongside and on top of fragile gilded surfaces, enabling a level of detail and luminosity that oil paint struggles to replicate in this context.
The primary advantage of egg tempera is its drying process. The egg yolk emulsion dries quickly through evaporation to a tough, water-insoluble film. This rapid drying allows the artist to apply precise, fine strokes that do not bleed or mix, enabling extraordinary detail. More importantly, once dry, the paint is completely non-oily and inert. This means an artist can paint directly adjacent to a water-gilt area without any risk of oil from the medium seeping and staining the gesso ground, which would prevent the gold from adhering. It also allows for painting directly onto the gold leaf itself without the long drying times and potential adhesion issues associated with oil paint.
This compatibility enabled techniques like sgraffito, where a layer of tempera is painted over a gilded area and then delicately scratched away to reveal the brilliant gold underneath, as seen in the detail above. Furthermore, the optical quality of the tempera binder, which creates a crisp, semi-matte surface, contrasts beautifully with the deep, reflective shine of burnished gold. The light reflects off the gold and passes through the semi-translucent tempera layers, creating a luminous effect that defines the sacred art of this period. This historical pairing, evident in masterworks at galleries like the Uffizi, was the bedrock of an artistic tradition built on the interplay of light, color, and precious metal.
By understanding this relationship, a contemporary artist can unlock a visual language that is both historically resonant and powerfully expressive, achieving a unique synthesis of sharp detail and radiant light.
To integrate these timeless techniques into your own practice, the journey begins not with a purchase, but with a commitment to understanding the materials. Start by mastering the preparation of a single perfect panel, for it is on that foundation that all brilliance is built.